This user guide gives an in depth description of Freestyle Includes: Data and how to use it including:
What the product does
How to install and uninstall
How to setup and use
Note: This guide is a work in progress, and more section and information will be added over the coming weeks.
The following User Guide only applies to Includes: Data v2 and above.
2. What is Freestyle Includes: Data
Freestyle Includes: Data is a component that allows you to create your own sets of data and display the data on your site. The data sets are fully customizable, and you can specify what fields that data has. When outputting the data, you define a HTML template using the built in WYSIWYG editor to determine how the data is displayed.
If you are using the Pro version, the output data can also be searched, sorted and filtered if you require.
Once you have defined your template, data structure and added some data, it can be output on your site using a tag within an article such as:
{data my-data}
You can also create menu items to your data instead of having to create an article first!
3. Basic Overview
Freestyle Includes: Data is a fairly complex component, and requires a bit of information before you get started.
The main thing you will be dealing with are what we call 'Data Templates'. Each data template contains the template you wish to be applied to your data, and a list of fields for the data that will be created.
You will also need to create 'Data Sets'. A data set is a set of data that is specific to a data template. Having multiple data sets available allow you to have the same data template applied to different data.
4. Quick Start
First you must create a new "Data Template". This contains the HTML template that you wish to output, and CSS associated with the template, and the structure of the data that you are displaying.
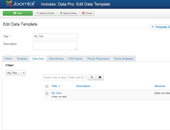
In the "Includes: Data" component menu on your Joomla backend, goto the "Data Templates" section.
Create a "New" template, and provide a descriptive title for it. Once you have entered a title, "Save" your template. This will open up the rest of the options available.
Quick Example
Below are some screenshots giving a quick example of the setup of a "Data Template".
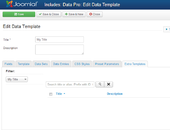
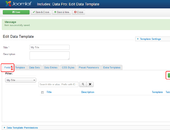
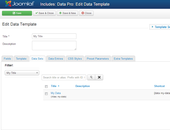
Creating a Template
First you must create a new "Data Template". This contains the HTML template that you wish to output, and CSS associated with the template, and the structure of the data that you are displaying.
In the "Includes: Data" component menu on your Joomla backend, goto the "Data Templates" section.
Create a "New" template, and provide a descriptive title for it. Once you have entered a title, "Save" your template. This will open up the rest of the options available.
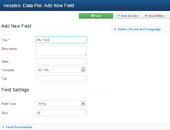
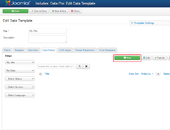
Setting up Fields
To store the data you want to display, you must first define what you would like to store. This is done by adding "Fields" to your "Data Template".
To add "Fields" to your "Data Template", edit the data template, and goto the "Fields" tab. Click the "New" button to begin adding a field to your data template. On the popup form you can specify the name and type of the field you wish to store data in, and any associated paramters.
Once you have added a field, an alias for the field will be generated. You can use this alias within your template to output that field. If you created a field called 'Name', its alias would be 'name'. To display that in the template, you woul add {name}.
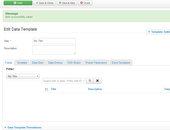
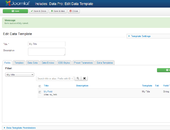
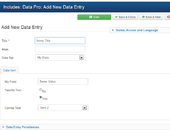
Adding Data
Each data template can have multiple "Sets" of data. This allows the template to be output differently depending on what data you wish to display. A data set is a collection of data that will all be displayed together.
When editing the data template, goto the "Data Sets" tab.
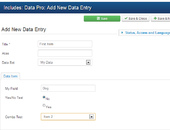
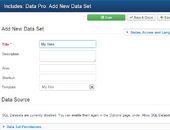
Create a "New" dataset. A popup will appear asking for details on your data set. Enter the title of the dataset. The "Alias" will be the identifier used to select the data for inclusion on your pages. The format to display a dataset is {fsi data your-alias}. You can enter a "Shortcut" to this format in the Shortcut field. This will allow data to be included as {your-shortcut}.
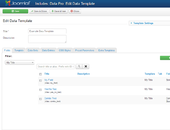
Once you have created your dataset, "Save & Close" this page.
The data set you have added will now be displayed within the "Data Sets" tab. Click the "Edit Data" link to be taken to the "Data Entries" tab where you can start entering some data.
Use the "New" button in the data entries tab to add a new item to your data.
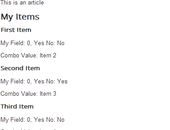
Displaying
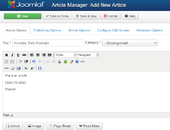
To output your templated data, in a Joomla! article you need to enter one of the lines out of the "Shortcut" field when listing the datasets.
An example would be {data example-movies}. This will cause the dataset with alias "example-movies" to be displayed.
5. Filtering, Searching and Sorting (Pro Only)
Sorting
There are 2 types of sorting tag available within Includes: Data. The first will generate a link that will sort the data, the second will output a dropdown box to change the sorting.
Sort Links
To output a sort link, you need to use the following tag in your template:
The alias of the field you wish to sort your data by.
display
The text that is displayed for the link. At the moment, you cannot pass HTML code to the display tag. If this is not provided then the field name will be used.
Parameters with a * are required. Any extra parameters that are passed will be added as attributes on the link generated (This can be used to set the class of style of the link).
Sort Dropdown
You can create a drop down select box for changing the sorting of your data using the following tag:
The 'heading' parameter is optional, and is used to specify the heading for the drop down when there is no sorting selected.
The 'default' parameter is also options, and specifys the default sorting to be used. Enter the alias of the field to set the default sort. (Version 2.3.0 and above)
For each of your fields that you wish to appear in the sort drop down you need to add a parameter of field_alias='Display'. The 'field_alias' is the alias of the field you want to be able to sort by, and 'Display' is how you would like the field labelled in the drop down.
For example, if you would like to sort you data by the fields 'title', 'name' and 'company' the tag would be:
{sortdrop heading=' - Sort Data - ' title='Title' name='Name' company='Company'}
This would generate the following sort dropdown (this example dropdown will not do anything):
You can also pass a 'class' parameter to add a CSS class to the select drop down and the 'style' parameter to set the CSS styles of the drop down.
Filters
To display a filter for you data, that can be used to select a value of a specific field use the following tag:
The alias of the field you wish to filter your data by.
heading
The text that is displayed as the default value for the filter.
The tag will output a drop down select box, populated with all the different values of the field specified. Once the user selects a value from the drop down the data displayed will be refreshed and only display items where the field matches what the user has selected. Any extra attributes that you specify will be added to the html generated. This can be used to add a class or styles to the select box.
Searching
You can display input boxes and buttons to allow the searching of your data that is being displayed within Includes: Data
Search Input
To output a search input box, you need to use the following tag:
{search_input field='title'}
Parameters:
field *
The alias of the field you wish to search in your data.
Parameters with a * are required. Any extra parameters that are passed will be added as attributes on the input box generated (This can be used to set the class or style of the input box).
The field parameter can also specify multiple fields to search. Pass the alias of all the fields you want separated by a comma:
{search_input field='title,name,company'}
Pressing Enter on the input will perform the search and refresh the data displayed. You can use the {search_button} tag to display a button that does the same thing.
Search Button
To display a button for running a search on your data, you need the following:
{search_button label='Search'}
Parameters:
label
The text that is displayed for the button.
Any extra parameters that are passed will be added as attributes on the button generated (This can be used to set the class or style of the button).
Reset Button
A reset button is used to reset all the search, filtering, ordering and pagination on a set of data. The tag required is:
{reset_button}
Any parameters that are passed will be added as attributes on the button generated (This can be used to set the class or style of the button).
Pagination
You can enable pagination of your data easily by using the {pagination} tag. In the tag you will need to specify how many items you would like to display per page using the per_page parameter.
{pagination per_page='10'}
The tag will output a standard Joomla! pagination bar allowing you to select different pages of data.
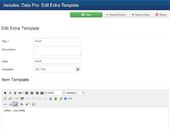
6. Alternate Templates
When editing a "Data Template", using the "Extra Templates" tab, you can define alternate HTML Templates for your data. Once you have saved your extra template, you can use its alias in a tmpl parameter to change the template used. An example tag would be:
{data my-data tmpl='quick-list'}
Using the tmpl parameter will not output using the template specified in the "Template" tab, but instead use the one you created as an "Extra Template"
7. Tips and tricks
Within your item template, you can use the following code:
<pre>{$item|print_r}</pre>
This will output all of the fields that your current item has for reference.
When using SQL Data sources, and Smarty SQL Processing, it is often usefull to display what SQL is being used to retrieve your items. In v2.5.2 and above, you can use the following tag to display the SQL used to retrieve data being displayed:
{$sql}
8. Requirements
Freestyle Includes: Data has the following technical requirements:
Joomla 2.5, 3.3 or 3.4
PHP 5.3 or later
MySQL 5.x
All Freestyle Includes components work through a single Joomla! content plugin. For Freestyle Includes: Data to function, you must ensure that the "Content - Freestyle Includes" plugin is enabled. To check this, on your Joomla! admin pages, goto "Extensions" -> "Plug-in Manager". Search for "Content - Freestyle Includes" and make sure that the status is checked. If it is not, then clicking the red circle will enable the plugin.
Please ensure that you have the most current version of your copy of Joomla installed. Our components and extensions are developed and tested only with the most recent versions of Joomla.
9. Installation
To install Freestyle Includes: Data on your Joomla! site you will need to do the following steps:
Download the component from our websites downloads section.
Go to your Joomla! web sites Administration page ( http://www.yoursite.com/administrator/ )
Log into your Admin account
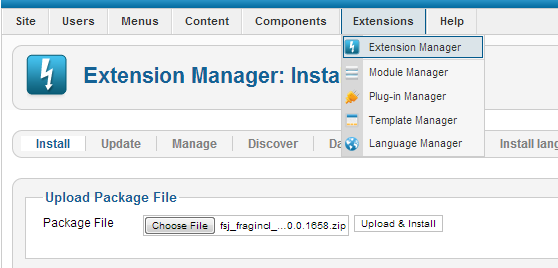
From the menu at the top of the page select "Extensions" -> "Extension Manager"
Under "Upload Package File" click the "Choose File" button.
Select the zip file you downloaded from our site and click the "Upload & Install" button
Your component is now installed and can be found under "Components" -> "Freestyle Joomla" -> "Freestyle Includes: Data"
To update an existing installation of Freestyle Includes: Data you do not need to uninstall the component first. You just need to follow the instructions for installing.
To uninstall Freestyle Includes: Data you need to log into your Joomla admin backend as described in the installation process.
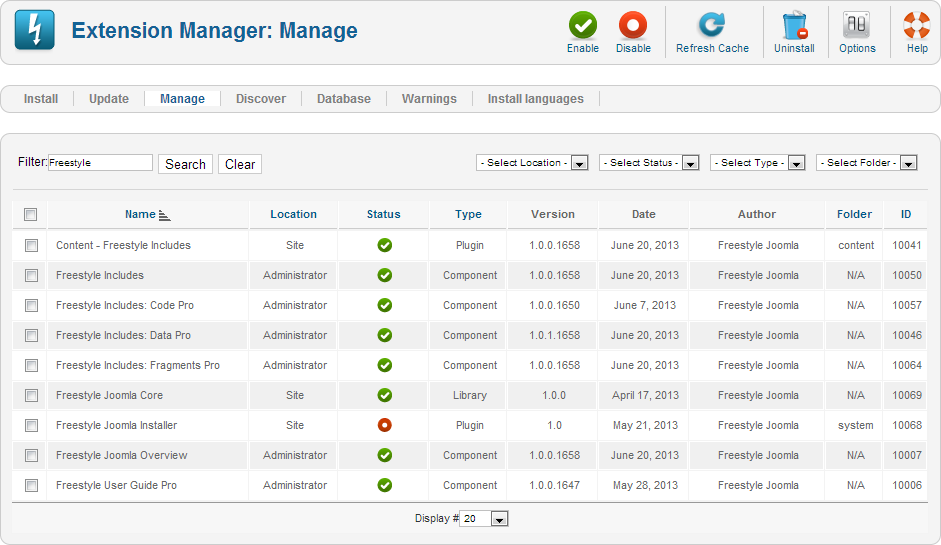
Goto "Extensions" -> "Extension Manager", then to the "Manage" section.
In the "Filter" enter "Freestyle" and click "Search". This will display a list of all the Freestyle Joomla components that you have installed. Check the box on the left of the list and click the "Uninstall" button on the top right of the page to uninstall a component.
The following components are required by all Freestyle Joomla components and should not be uninstalled unless you are removing all Freestyle products.
Freestyle Joomla Core
Freestyle Joomla Overview
Freestyle Joomla System Plugin
Also, if you have any Freestyle Includes products installed, the following compononets and plugins are required and should not be removed unless you are removing all includes products.
Freestyle Includes
Content - Freestyle Includes
You can remove and "Freestyle Joomla Installer" installer items at any time as these are not required by the products, and are just used for installation.
Vote for it on the Joomla! Extensions Directory! Voting for our products helps attract more users, which leads to better products!You can also view a list of all our products on the JED here.
Testimonials
PLEASE_WAIT
Fine components with a great support, I recommend the products of Freestyle! And success!
Carlos Souza
@
19:24